How to Build Custom Travel Maps…
Everyone holds a map to all of the places they’ve fished and want to fish. Some have an old Rand McNally map that’s highlighted and marked up. Others have pins on a wall map. Still others hold it all in their heads. But in the 21st Century, you can have a detailed world map that marks drainages, bridges, piers, and other landmarks. You can mark GPS coordinates, write notes, and do everything you’ve ever imagined and more without pushpins or highlighters.
“Nonsense!”
“Heresy!”
*spittle flying out of the corner of old man’s mouth as he says “Blasphemy!” at the top of his lungs, coughing slightly afterwards*
It’s true. You can create a map that marks every place you’ve ever fished, want to fish, or the place your roommate’s strange friend mentioned in passing that warrants another look.
X marks the spot.
Google My Maps
I’ve always marked the locations I fish, what I catch, and other details in spreadsheets, but I never tracked exact locations beyond the waterbody. While I could always find places a second time, I struggled to share them with others because sometimes “you just had to be there.”
At the time of writing, my Fishing Map included nearly 2000 points spread across a dozen countries. I include places I really want to fish as well as those I already have fished.
Creating Your Map
1. Open the program. In order to create your own fishing map, log in to your Google Account and go to maps.google.com.
2. Click the three stacked horizontal lines in the top-left corner of the screen to expand a menu.
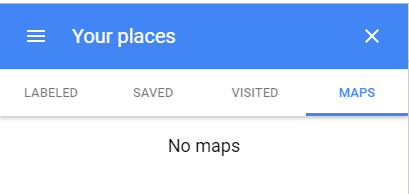
3. Click “Your Places” from that menu.
4. Four tabs will populate at the top-left of the Google Maps toolbar. Click “Maps” at the top-right of the toolbar.
5. Click “Create Map” at the bottom of the toolbar.

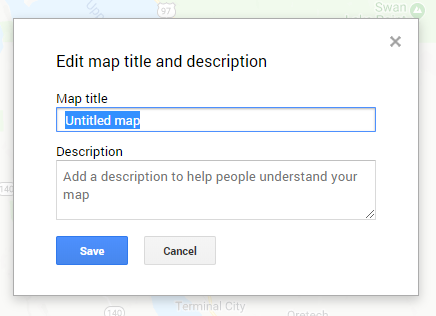
6. Once your new map populates, you’ll start by naming it. Write a name and description that you like and hit “Save” at the bottom-left corner.
7. Next, come the controls.
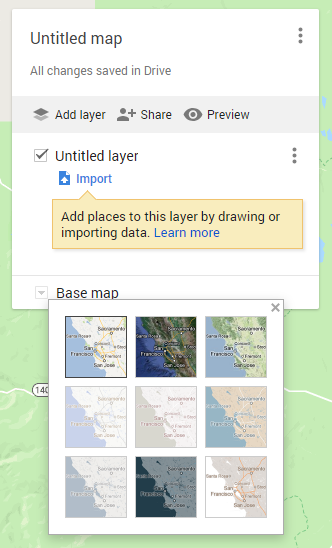
In the gray toolbar below the name, you can click “Add Layer” to do what clear plastic map covers used to do to, say, show phases of construction. I have several layers: one for all of my fishing spots another to mark newspapers, magazines, and other publications in which I’ve been published, and one to mark national parks.
You can “Share” your maps with others, but be careful. How many people do you want to grant tromping around your favorite waters? One person can easily turn into a dozen if you start with the wrong one. If you do want to share, click the button and type their email, but be sure to give them “View Only” access, so they don’t mess anything up.
“Preview” isn’t terribly useful.
Below the gray bar, you can title each layer if you choose to do so.
The most important control here on the left is the downward facing arrow by what says “Base map” as it allows you to filter between map views. I primarily use the default map view and the Satellite imagery, as they help you find roads, small streams, and geographical features if you swap between them.
8. Those aren’t the only controls.
The toolbar at the top allows you to search just like you would in Google Maps. Type into the white bar for locations, rivers, lakes, or other points of interest. It might be there. You can also type GPS coordinates into this box.

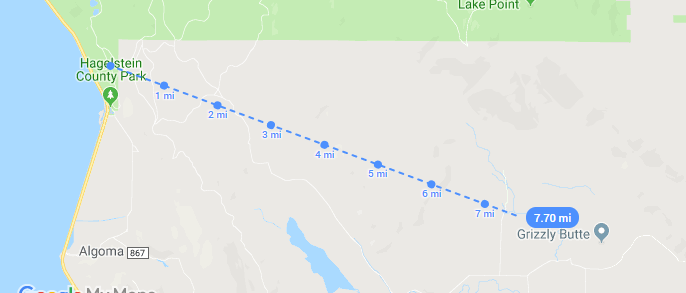
The two arrows below the bar are “Undo” and “Redo”. The hand allows you to grab and move the map around. The pin icon is the most important. You click it and then click it wherever you want to drop a pin on the map, and that’s where things get interesting. The split arrow allows you to add directions, but it’s not necessary. The ruler is awesome. It lets you calculate distance as the crow flies. Use it to determine hiking distances, spaces between boat ramps, etc.
9. As for placing pins…
It’s actually pretty easy. Place the pin where you want.
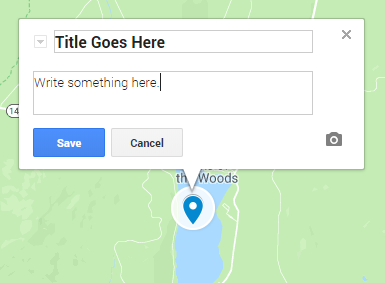
Write your title in the box at the top. Be creative yet specific. Add a description in the comments. I like to put a sentence or two about access, parking, where I found out about it, and then what species can found there.
Add a picture if you want with the camera icon.
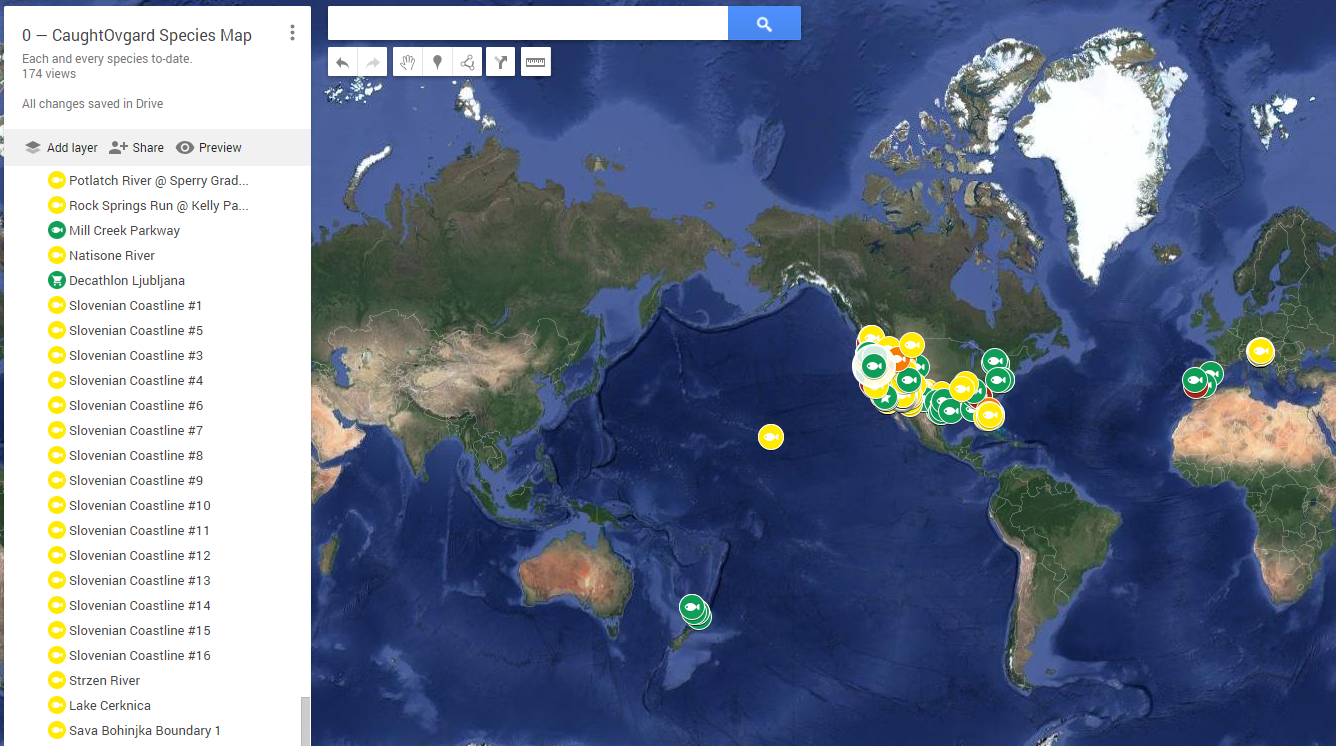
A completed pin will look something like this on my own Fishing Map:

Again, I like a specific title. Once you title your points, you can search for them in the white bar at the top — a necessity when your map grows large. This enables you to come back later and search for specific details without knowing exactly where the pin was located.
I also write specific and detailed comments.
I separate my species lists into “Unique Species” which is a totally subjective measurement I use to identify fish with limited ranges and “Common Species” which is slightly-less subjective. Do what you want, but make it work for you. I probably won’t be offended if you choose to make your map differently than I did. Probably. You’re probably wondering why mine is a green fish, huh?
I use four separate colors on my map, outlined below.
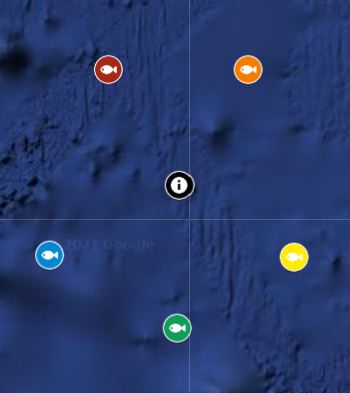
Red = I got skunked here.
Orange = Haven’t fished; no new species here.
Yellow = Haven’t fished; new species here.
Green = I caught all the species present here.
Blue = I caught fish, but not all species present.
But how do you make them colored fish? Well, you’ll have to ask the Swedes. I’m kidding, but Swedish Fish are always good.
No, it’s pretty easy. Once you save a pin, click the little paint can icon and choose from “Popular Icons” or click “More icons” for a shocking number of map icons. Some are weird. I won’t elaborate on that.
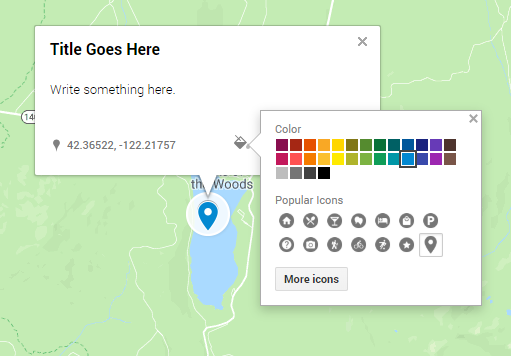
You don’t have to use a fish. There are a lot of different options, actually. I use the Star icon for charters, and have used a few others on occasion. Go crazy.
10. You’ve done it. Just keep adding pins, and then you’ll live happily ever after. One caveat, since I showed you how to do this, maybe you could send me a pin or two? I don’t ask for your money like Wikipedia or make you watch stupid ads like YouTube, so why not share a pin with me?
Shoot me a message on Fishbrain or Instagram @lukeovgard if you care to share. If not, it’s all good.
11. Back, back, back it up. You can export your map as an .xlsx or .pdf file and save it somewhere safe. Rather, you should export your map as an .xlsx or .pdf file.
Other Cartography Tips
- Time is precious. As soon as possible, write down the pin. Put it on a Post-It, write it on a note in your phone, or say it out loud repeatedly like a crazy person until you can add it to your map. There’s already enough forgotten treasures lost to time. Don’t let your hot new fishing spot be one of them.
. - When you go fishing, use the Notes app on your phone to record places. The data points were easy enough to track on my iPhone. I open the Maps app, click on the blue, slowly-pulsating dot marking my current location and then watch the coordinates slide up from the bottom of the screen. Copy and paste them to a Note. For you Android people, God bless.
. - You can also use your Camera app. If that isn’t an option, or you’re just lazy at the time, take a picture of the fish caught as well as a picture of the landscape. This serves as a visual reminder of where a particular fish was caught, but it also enables you to open the picture in the Photos app and scroll down to the bottom and see where on the map the photo was taken. Unfortunately, the Camera app won’t provide exact GPS coordinates, but with Location Services enabled, it does allow you to see a spot on the map, and you can either open Google Maps on your computer or tap on your Maps app in another window to find the exact coordinates of where you were fishing after the fact. It’s a bit tedious, but it is worthwhile.
. - You can also do this with fishing photos people send you if they had Location Services enabled when the picture was taken, so long as the metadata hasn’t been stripped away. It’s kind of a secret, so don’t ruin it for me.
- Ask people for their spots. You can be shameless, but offer to trade a similar spot in kind. I’ve done a lot of that, and it can be a fair trade for both sides.
. - Look at scientific papers to mark exact drainages and hone in on likely places for elusive species. This is usually public record, so you can track down weird species if you have the time and patience.
. - Participate in forums online to glean as much information publicly shared as you can. Anglers are are enigma because they love bragging and sharing what they caught but can also be super-secretive about the details of their catch.
. - Just try going out and fishing new spots to see if they are worth keeping track of. Some will be. Others won’t make your map.
Data Matters
Even if you don’t like species hunting like I do (that is, trying to catch as many different species of fish as possible), a Fishing Map still has applications. Record exact holes where you hooked into salmon, ledges you caught monster bass on or current seams that always seem to hold big trout.
If you’d like to see my private Fishing Map, compiled over the decades, click here.
Good luck and happy hunting.
Tight lines!